SIP Trunk Configuration Guide
How to configure SIP registered trunk with Yeastar P-Series PBX System
Configure a SIP Trunk
1. Create an Account with the SIP trunk provider.
To start with, you need to have an account from your SIP trunk provider.
2. Configure Termination and Origination in Twilio
2.1. Go to Elastic SIP Trunking > Trunks > Termination > Termination URI, configure your localized Termination SIP URI.
- If you select North America Virginia, Twilio Termination SIP URI would be example.pstn.us1.twilio.com;
- If Europe Ireland, would be example.pstn.ie1.twilio.com;
- Fore more localized Termination URIs, please click here.
2.2. Go to Elastic SIP Trunking > Trunks > Termination > Authentication, authenticate your PBX domain.
- Only one authentication scheme is required (IP ACCESS CONTROL LISTS or CREDENTIAL LISTS).
- If IP ACCESS CONTROL LISTS is configured, then the PBX side will use the type of peer-based trunk for docking; If CREDENTIAL LISTS is configured, then the PBX side will use the type of register-based trunk for docking.
2.3. Go to Elastic SIP Trunking > Trunks > Origination, configure your localized Origination SIP URI with the region parameters.
- If you select North America Virginia, Twilio Origination SIP URI would be sip:your_static_ip_address_of_pbx:port;region=us1;
- If Europe Ireland, would be sip:your_static_ip_address_of_pbx:port;region=ie1;
- Fore more region parameters, please click here.
3. Add a SIP Trunk in P-Series PBX System
After you get the SIP trunk account, you need to add a SIP trunk in Yeastar P-Series PBX System.
Go to Extension and Trunk > Trunk, click Add.

4. Configure the trunk

Basic
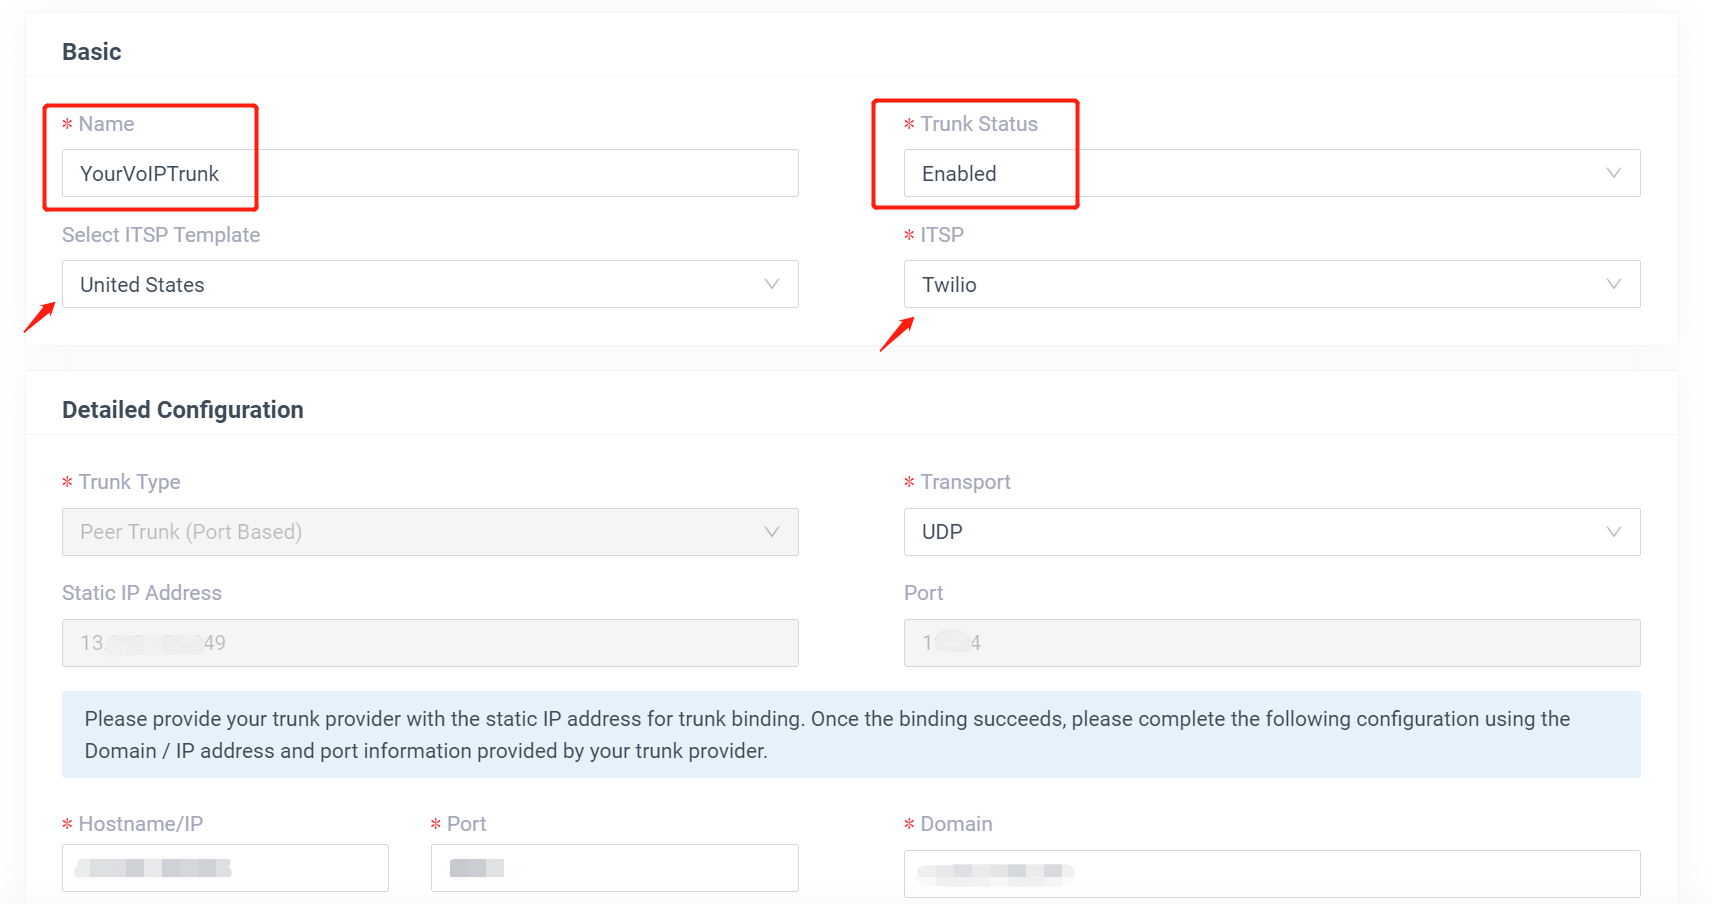
- Name: give this SIP trunk a name to help you identify it.
- Select the drop-down list of “Select ITSP Template” and choose “United States”. Then select the “ITSP” name in the right box and choose “Twilio”. All the parameters are embedded except the account registration information.
- Make sure the trunk status is “Enabled”.
Detailed Configuration
The parameters of Twilio are embedded. You don’t have to figure out Trunk Type, Transport, and Port.
- Trunk Type: Peer Trunk (Port Based).
- Transport: UDP.
- Static IP Address and Port: please use this information to configure Origination in Twilio. Please refer to Step 2.3. in this guide.
- Hostname/IP: your Twilio Termination SIP URI.
- Domain: same as hostname.
5. Check the Trunk Status
Click Save and Apply. Check if the trunk is connected in Status.

Configure the Outbound Route with SIP Trunk
To make outbound calls via the newly created SIP trunk, you need to configure an outbound route for the trunk.
1. Create an Outbound Route
Go to Call Control > Outbound Route, click Add.

2. Configure the Outbound Route
The system compares the number with the pattern that you have defined in your route 1. If it matches, it will initiate the call using the selected trunks. If it does not, it will compare the number with the pattern you have defined in route 2 and so on. The outbound route which is in a higher position will be matched firstly.
You can adjust the outbound route sequence by clicking these buttons![]()

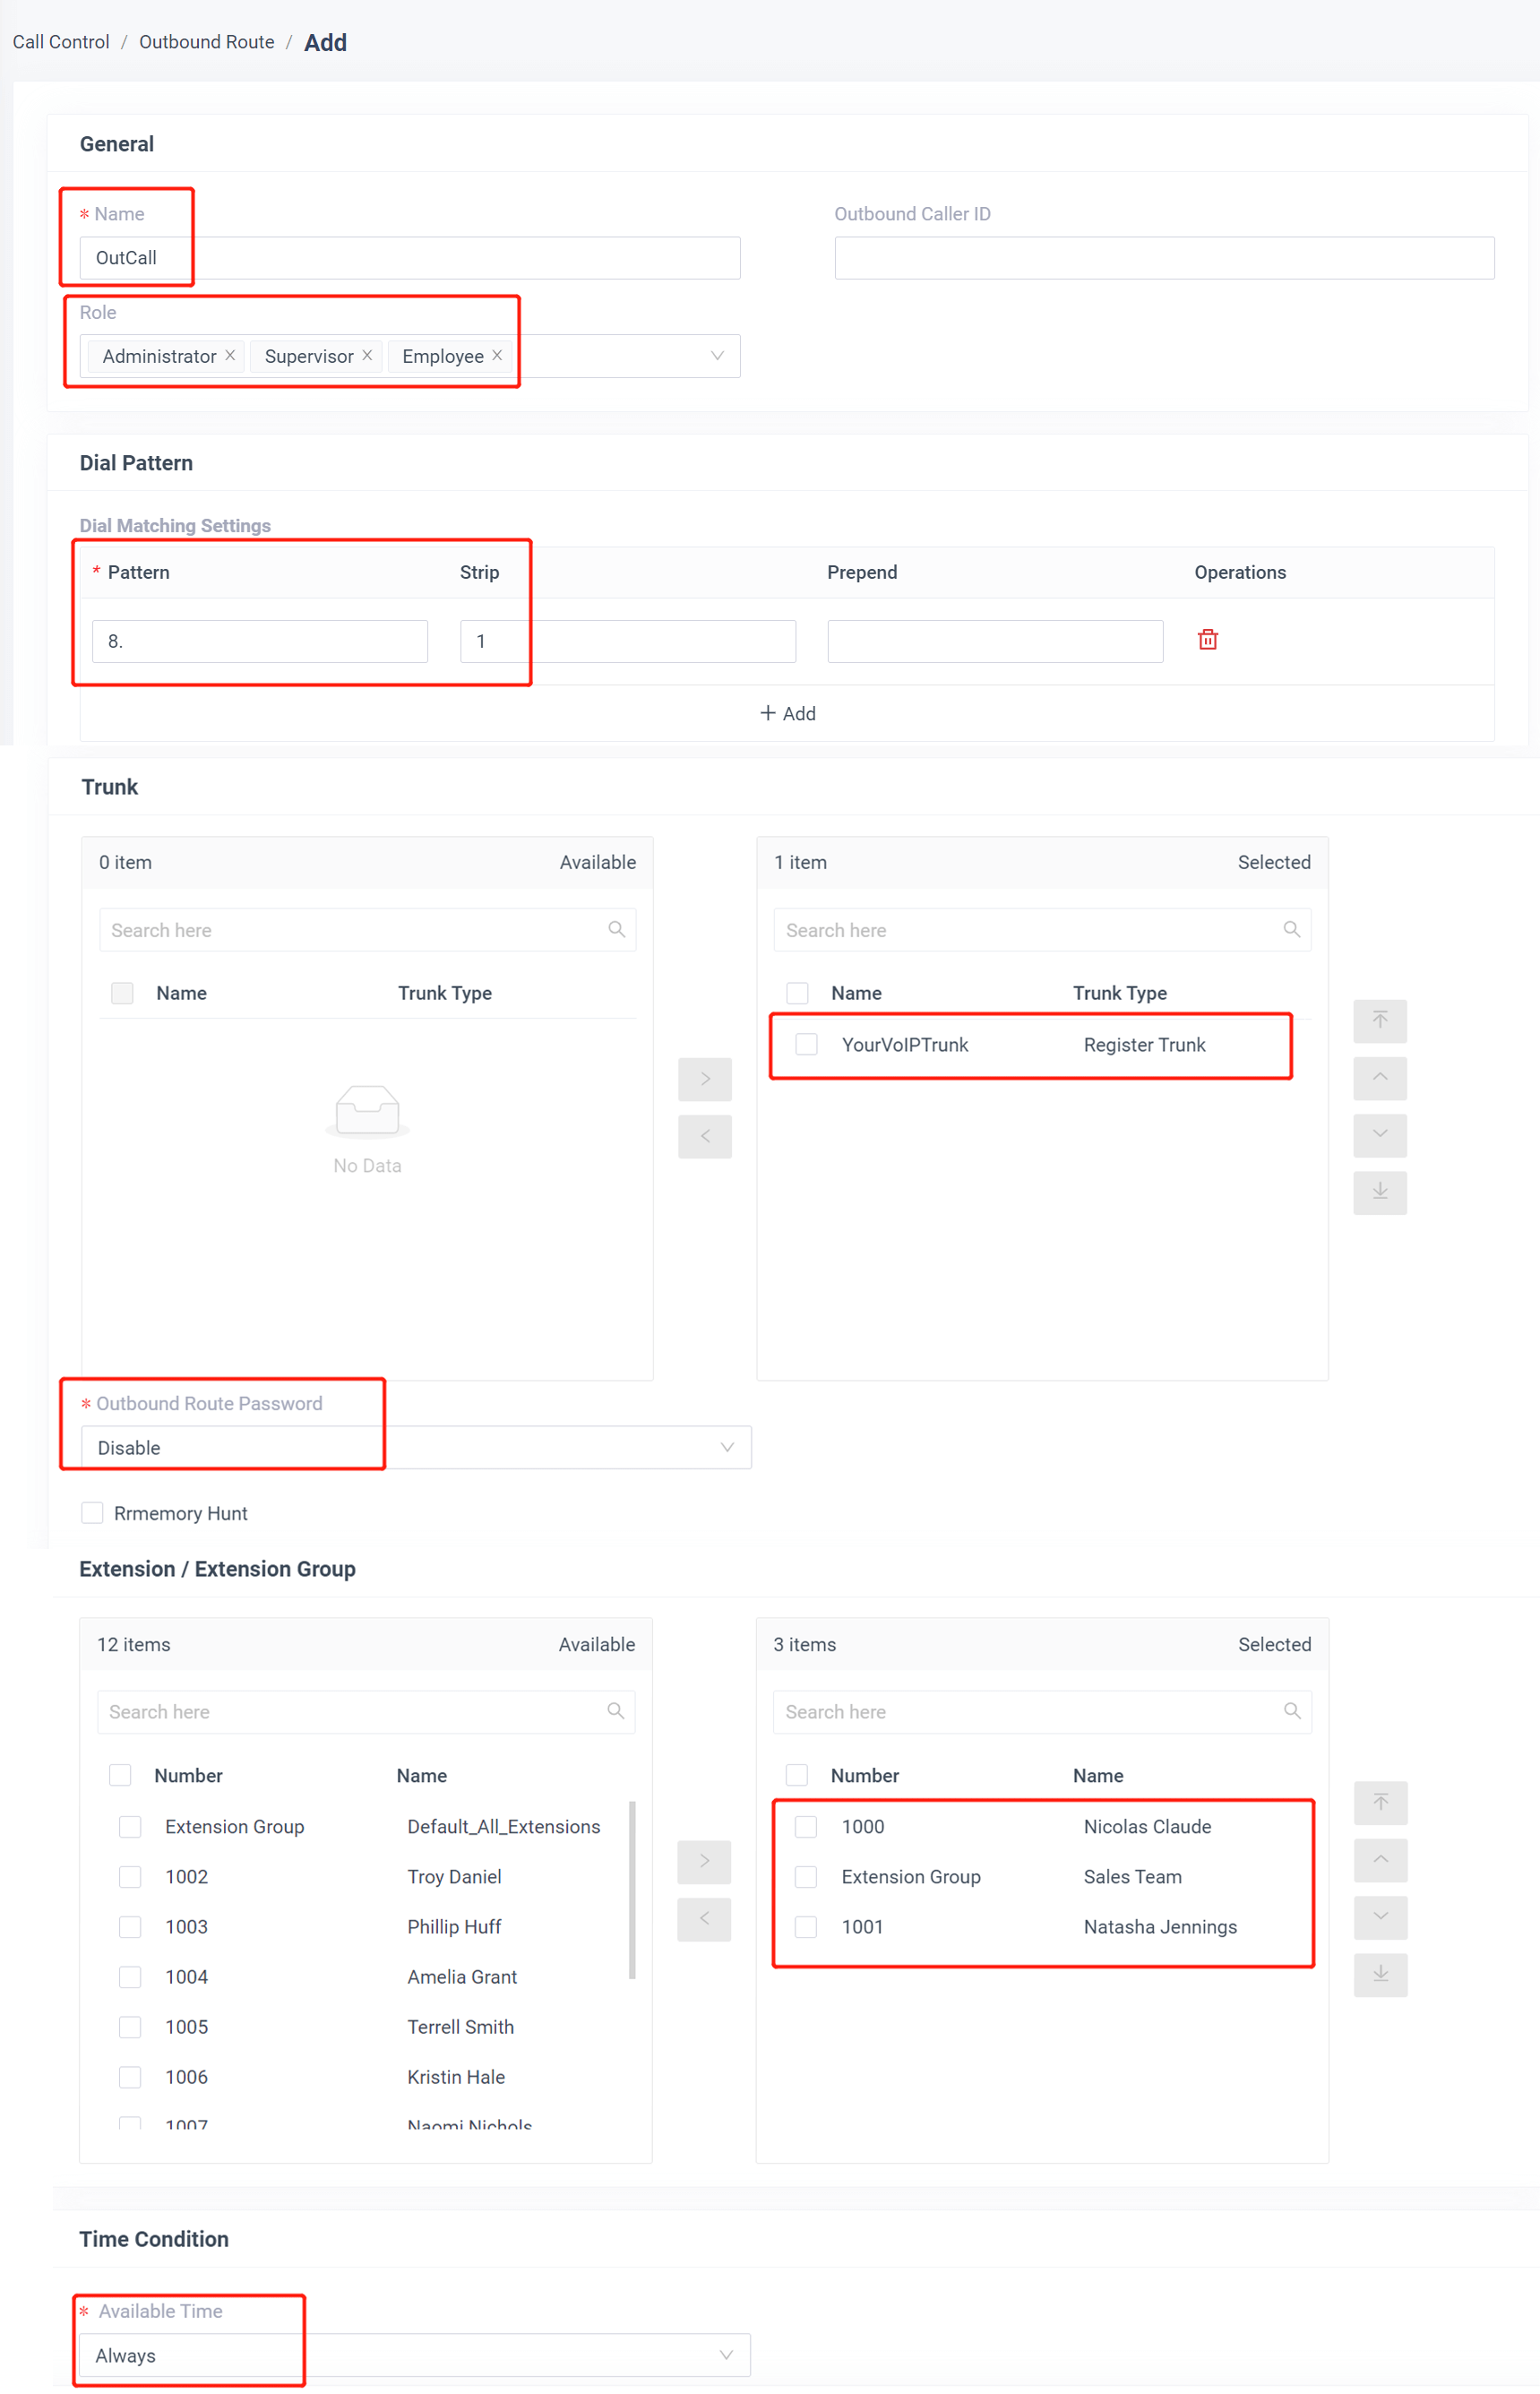
- Name: give this outbound route a name to help you identify it.
- Role: select the role that can use this outbound route to make outbound calls.
- Dial Patterns: set the dial patterns. As the settings below, to make calls via the SIP trunk, you need to precede the number to be dialed with the prefix 8.
- Dial Patterns: set the dial patterns in E.164-formatted.
- Strip: 1
- Trunk: select the SIP trunk.
- Outbound Route Password: you can prompt users for a password before allowing calls to progress.
- Extension/Extension Group: select the extensions or extension groups that are allowed to make calls through the outbound route.
- Time condition: select time condition to allow this outbound route.
3. Click Save and Apply
Now you can make outbound calls through the SIP trunk. As the dial patterns configured above, you need to dial “8” before the destination number.
For example, to call the number “01234567”, you need to dial “801234567” on your phone.
Configure the Inbound Route with SIP Trunk
To specify how calls from the SIP trunk should be routed, you need to configure an inbound route for the SIP trunk.
1. Create an Inbound Route
Go to Call Control > Inbound Route, click Add.

2. Configure the Inbound Route

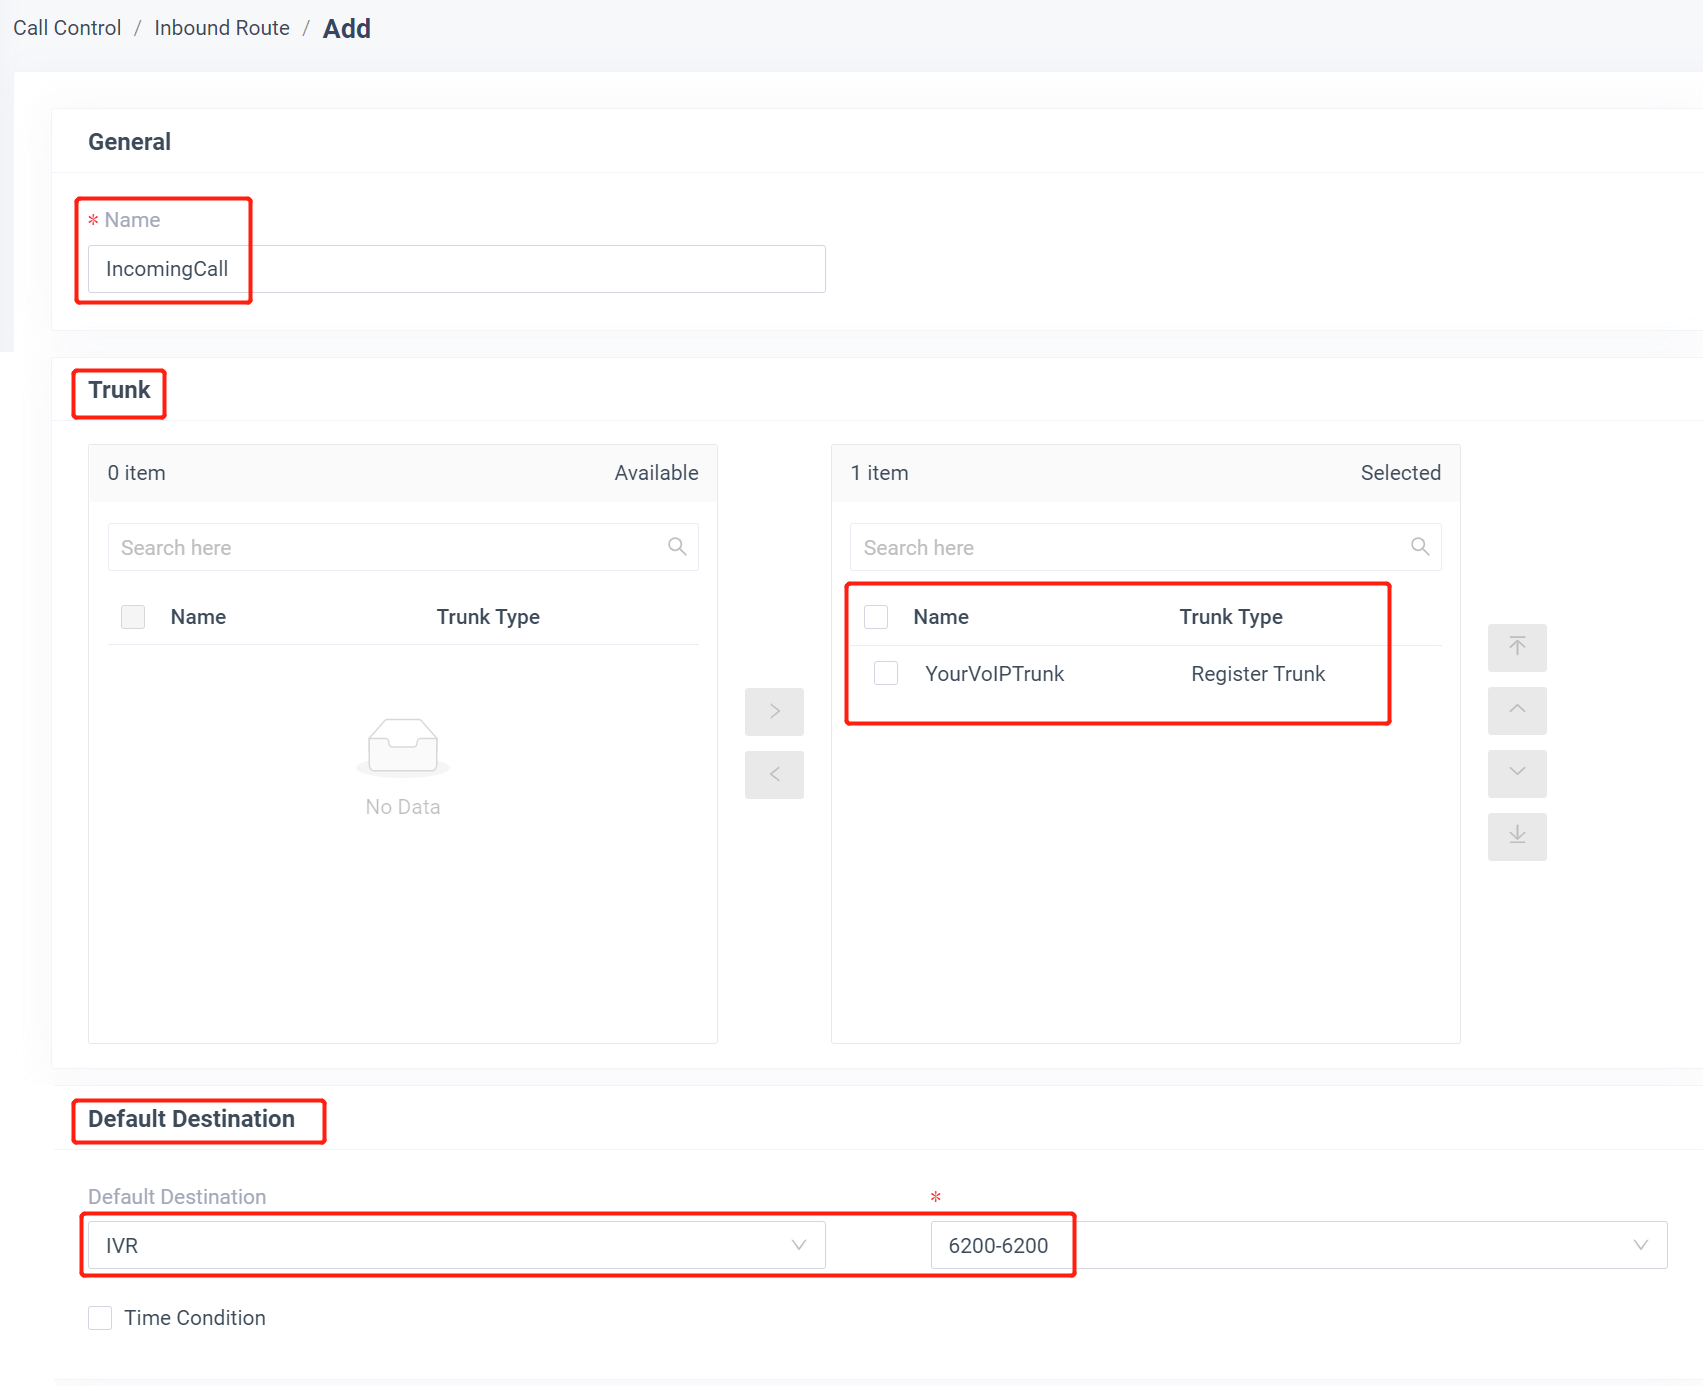
- Name: give this inbound route a name to help you identify it.
- DID Pattern: specify the did pattern to match and pass the incoming call through this inbound route.
- Caller ID Pattern: define the caller ID number that is allowed to call through this inbound route.
- Trunk: choose the SIP trunk.
- Default Destination: select the default destination or set with Time Condition.
3. Click Save and Apply
When you call in the SIP trunk, the call will be routed to the destination configured on the inbound route.
